First, since I'm proud of myself, here's the "after":
Do you recall the "before"? Dirty, plain light blue fabric. While the slipcovers were constructed well (maybe even better than mine) the ottoman was a joke. Some things you improve, some things stay status quo. At least the overall looks MUCH better than it did when I bought it with my friend Annie (check out her blog here, at Confessions of a Navy Wife.)
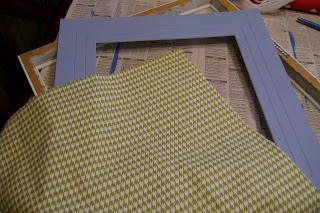
So, to get started, I cut two squares of fabric from my humongous piece of polka dot fabric that would work for the size I needed. (seriously, what was I thinking? I could cover two more full ottoman sets at LEAST with the amount I have left!!! I think I got something like 4 yards of 54" fabric? Good thing it was a STEAL...)
Then, I removed the blue covers from the cushions (which just sit in the chair form, aren't snapped, banded, or otherwise actually attached to the frame) and laid them out on my wrong side up polka dot fabric.
I laughed a little when I saw the backs and bottoms of the cushions were just hand sewn together...
There were two cushions to slipcover- the back, and the seat cushion. The back was more or less a square, but had the trickiness of needing the loops to hold the cushion to the frame sewn in.
Let me just pause here a minute. Did I even mention to you that I haven't pulled my sewing machine out in months, and now I was planning to tackle making my first slipcovers? No? Well, yes, I was petrified. The last thing I made were these straight seam orange curtains, and these envelope fold chevron fabric pillows... For some reason, winding the bobbin, sewing rounded seams instead of straight... all these things gave me the heebie jeebies. I don't know why I was so scared. Really. I think I was most concerned about getting the tread all tangled up in the insides of the machine because I did something small and stupid. But, alas, reading directions helps! Even though the poor translation of these Janome instructions made us laugh the first time I used the machine, months back, this time was serious and I had to pay attention to what they said... Outcome? It worked. Just fine. Now I'm not scared. End the pause.
I attempted the back cushion first, and it went relatively well. I left the bottom seam open until I tried it on the cushion, and fit it to the chair. When I realized it worked, and was finished with my happy dance, I sewed the bottom cushion closed.
The rounded edges of the lower cushion posed a slight problem for me, but going slow with the foot pedal, (no, I guess this was not the autobahn) it worked out. For this cushion, I had actually traced the pattern with a pen as well as pinning it, so that I had a guide to work by. Since the fabric is so heavy duty, it doesn't show through at all, and me being scrappy, I had just used a ball point pen anyway to do the tracing. :)
Is it just me, or does this look like a piece of toast? No? I'm just pregnant and hungry you say? ok, fine...
Sewing this cushion together at the back (the last seam) was trickier than the first because I hadn't left much excess fabric to work with. After some help holding it properly from Z, a broken nail, and some severely sore and tired hands, the cushion was closed (but looked like crap on that back seam) and fitted to the chair. Shhh, don't tell anyone how bad the back seam was. :)
Anyway, even though the nursery isn't being re-assembled yet, we're already enjoying the glider. It's still in the family room, and I just love the polka dot fabric.
And, as a nursery checklist reminder, the following projects still need to be completed:
- Chair rail added above the beadboard (in progress today, weeeeeee!)
- Baseboards added to the floor (in progress today, weeeeeee!)
- Furniture (well, the crib at least!) to be built
- Furniture placed (dresser is in the garage still, and yes I "won" the one I saw on craigslist!)
- Artwork Hung
... The curtains are finished, I'll share those with you soon too... Here's a sneak peak:
Here's the mood board, again, for the eleventy-billionth time:
And, to my (really, my sister's) sewing machine, I'm sorry to have doubted you.
So there's the recent progress... We're getting there, and so is the final baby countdown. As of today, I'm now 35w1d... time is closing in on us :)


