This one really caught my eye- the color, the sparkle, even the embellishments. I gathered the super easy supplies: 14" foam floral wreath, orange flat sided marbles, terra cotta acrylic paint, ribbon, and a gold sprig.
What a BEAUT:

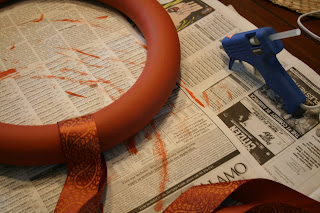
To make this, it's almost so simple that with the exception of the hot glue, I would say this is a project a 7+ year old could do. First, paint the wreath the main accent color for your marbles. Before gluing any marble gems, add the ribbon which you'll cover with the gems later. I used a sponge brush, and unscrewed the lid and poured some onto a piece of aluminum foil. I had to let the wreath dry on one side before flipping to do the other side. I ended up doing 2 coats, just in case, and was glad I did because you don't actually cover the ENTIRE surface with marbles- they don't all fit in like a perfect puzzle.


Then, start gluing! I first started putting the glue right on the wreath, but later realized it was easier to glue the backing of the gem, and attach. :)


This was such a relaxing project!

At the end, I attached the gold sprig (with hot glue) I also purchased, and because it was wire, I was able to bend in the position I needed.
The final:
 Total project breakdown:
Wreath Form: $3.50
Paint: $0.50
Marble Gems: $10.50
Ribbon: already had (bought 2 spools, 4 yards each, for $3.50)
Gold Sprig: $1.15
TOTAL: $15.50ish
I love it! Thanks for the inspiration again, Kate!


