



Pages

WELCOME!

Happy 2012!

Welcome, won't you stay a while? There's so much to do, and we hope to share it all with you this year. Design, crafts, frugal living... You'll find this and more at Design-Aholic!

Showing posts with label painted. Show all posts

Friday, January 7, 2011

A little no-cost makeover

Anyone else out there relieved to pack away the holidays?  The house always looks so large once the tree is down, and the holiday decor is safely packed away and out of sight for another year.  However, the large space always leaves me feeling the urge for a change, and a fresh room.  It'd be easy, given all the money in the world, to plan out a fresh new space.  The trick though is to try a no cost makeover.

Our room has pretty good bones.  The couches are neutral, there's a brick fireplace, white slatted blinds, hardwood floors, etc.  I couldn't picture the room pulled together though (for our no-cost makeover) until the other day that I sat on the opposite couch in the room and it came to me.

Our makeover will be based on this color scheme:


So, the execution plan will consist of the following:

Paint ladder shelf black (I showed you this shelf before here)
Recover couch throw pillows in white fabric (I've done that once before, here)
Add series of four Black and White NY City prints to the room (from the office, that's not being used)
Reorganize picture frame ledges (see them before, here)
Add white cylinder lamp shade to current lamp, plus add another lamp (this room is dark at night!)
Re-arrange furniture

Here's the room now (right after Christmas decor was removed).  

NOTE: This is not for the faint of heart... I'm not proud, and I wouldn't consider this room pulled or put together in any way... ok, disclaimer over, now you can see the photos.  :)

How on earth do you decorate/stage a fireplace like this?!


The tree (9ft this year!) was in that back corner


Anywho, I hope to work on this room this weekend.  Our adorable baby boy though is so cute, that I just love hanging with him, so I'm not sure how much I'll get done!

Just thought I'd share.  Now, to get this done, and be excited over our room again!


Sunday, October 10, 2010

Budget Friendly Alphabet Art

One of the last projects for Baby Boy's nursery was completing some sort of alphabet art.  I had originally desired to make the alphabet a large focal wall, but that can wait until the toddler years.  After all, Z said he doesn't need to know his alphabet until at least 6 weeks... :)  So, for now, artwork in frames is what I went for.


This was a super thrifty project-  We're talking $3 in frames (yes, they're the same color of the crib and glider wood!) from the dollar store- 11x14" even-  They're big!  The letters came from a pack that was $3, and I used only 1/2 of the pack, so lets call it $1.50.  The rest of the materials I had on hand: white fabric, acrylic paint, spray adhesive, fabric glue...

So, here's how the second attempt at my alphabet artwork came together.

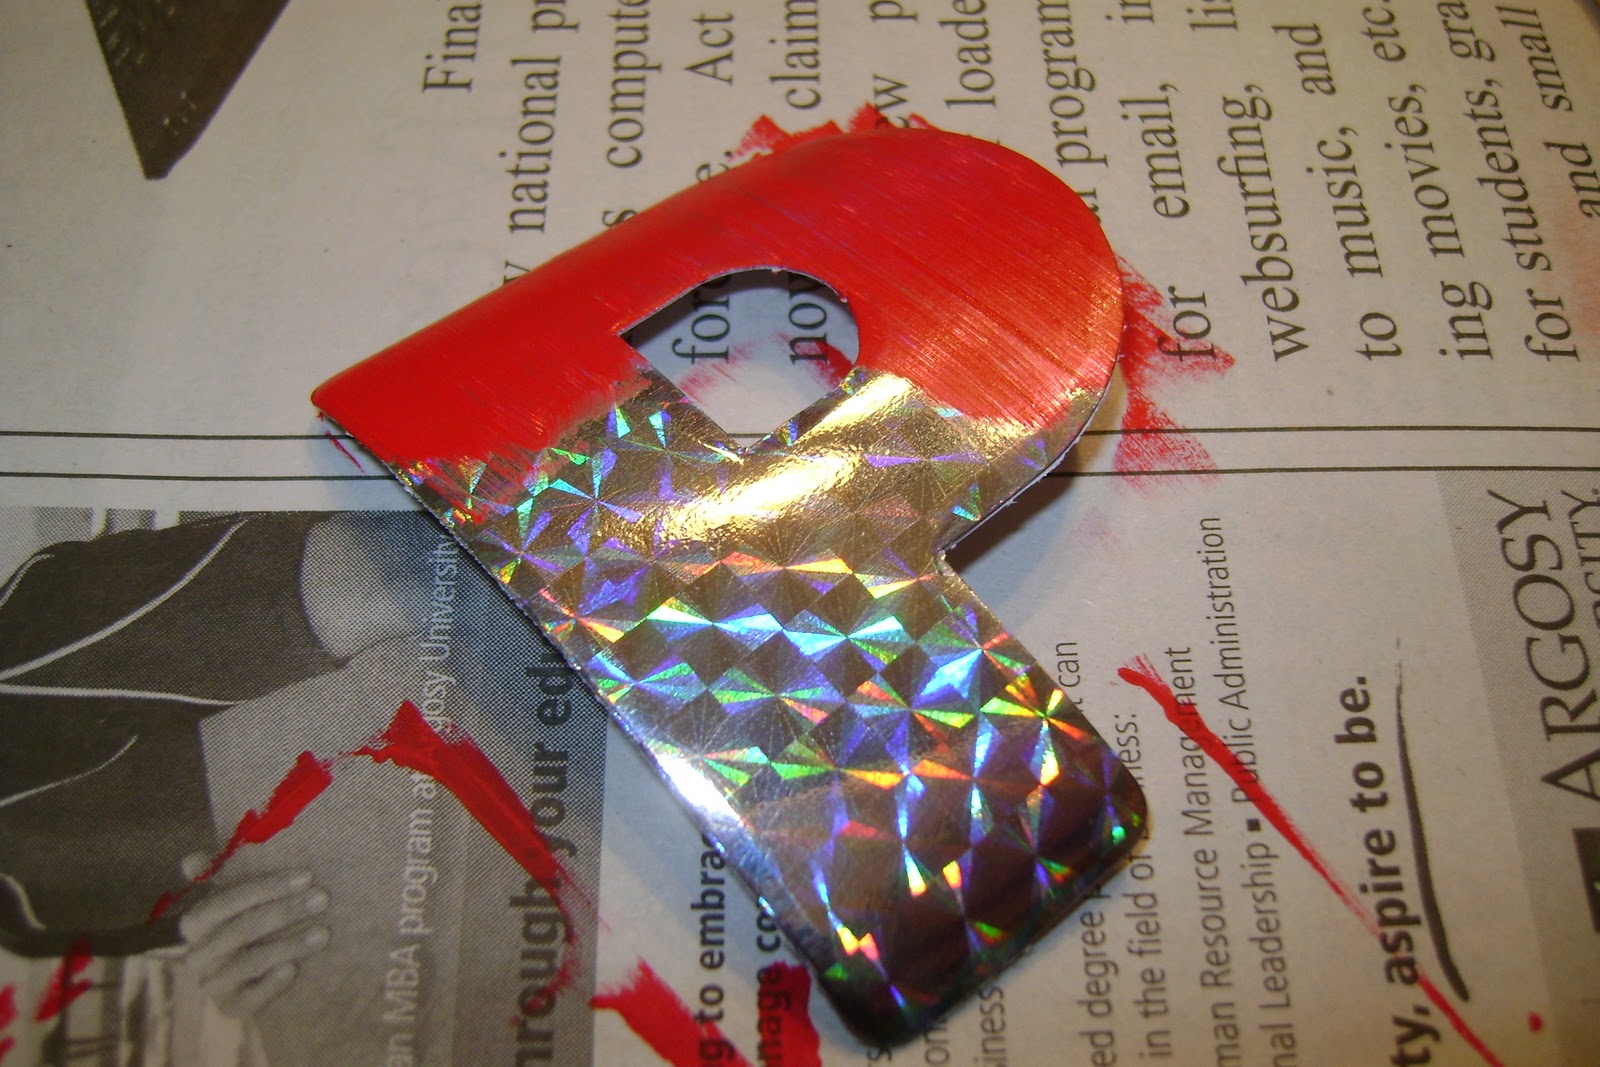
I found this pack of letters at the one trip I've made to Walmart in years.  They were $3 for the pack, and turned out to not be what I thought they were (I thought they were cardboard, turns out they're more like post it note letters...).  I used the holographic letters that were also included since they were coated, and I knew the acrylic paint would stick much better than to the black paper letters.


I organized them in the frames (with the black letters first), and started painting with the 5 coordinating colors in totally random pattern.  (I don't do random well, but it seemed to work this time!)


Each letter took at least 2 coats.  Some of them took 3 since the paint brand was a little cheaper (more water in the paint?)


I took these $1 11x14" frames from the dollar store, and removed the cardboard backing.  I used the spray adhesive to adhere the frame insert upside down to the cardboard, and then used the spray adhesive again to adhere the white fabric to the boards.  (I used this same curtain liner fabric for the laundry basket liner I made.  I guess it worked out that I had extra)  I used my rotary cutter to trim the excess fabric so it was nice and snug in the frame.


Then, I used fabric glue to attach the letters in the predetermined pattern to the white boards.  Clean the frames up with some windex, and snap back together!  Then, photograph for blog...


They're not hung yet.  What I'm trying to determine is whether they should go horizontal along the wall, or vertical.  You be the judge (but quickly, since baby is coming any day now!).  The reason for the question is because I still need to incorporate the mobile into the room, and I figured it would go in the corner by the dresser.  So here's the wall the alphabet art will go on.  What do you think orientation wise? 


Let me know what you think!

Wednesday, October 6, 2010

Lined Laundry Basket

Wow, sewing up a storm over here, and pretending to be a pro!  So, one of my last nursery projects (yes, ONE of the last...) was this laundry basket.

Let's just say I whipped up the liner.

First, I bought this basket probably a year ago ($4.99!), thinking I would actually turn it upside down, and use it as a side table in our family room... Then, all decor projects stopped when I got pregnant, because I just lost all energy.  Anyway, last week, we realized we had the diaper pail, a small trash can, but no place for those dirty clothes everyone seems to remind us we'll have.  :)  I asked Z to pull the basket down from the garage storage loft, and I re-purposed it.

Here's the basket before (perfect size I believe for baby laundry :) )


I painted the basket blue to start- a nice royal blue in a glossy finish (spray paint, of course...)

Then, I essentially sewed up a really large pillow case (thanks mom for the idea.)  I had originally thought I would cut a circle that fit the bottom of the basket, and then sew on the sides in a tube type style.  My mom quickly helped me realize with my novice sewing skills, that simply making a pillow case type liner would be quicker, easier, and just fine for this use.  I measured the depth needed, used some extra drapery lining fabric, and winged it sewing it together.  The finished seams are on the inside, where the clothes drop in, and the rough edges are on the outside of the liner.  I just move the basket so you can't see those.  :)


I added 1/2" elastic to the roll over sides of the liner so it stays in place.  Voila!  Totally simple, and an inexpensive final touch.  I love it in the closet now, but honestly like the color so much I might find a place for it in the room out in the open!


Oh, and notice the closet doesn't have doors?  Yep, those curtains I gave you a sneak peek on are up, and totally cute & functional.  I'll share those shortly with you all... They were another glorious sewing project.  :)

Hope you're enjoying the nursery posts!  I find myself walking in the room all the time, loving how it's turning out.  More to come still :)


Monday, October 4, 2010

Power of Paint: Tin Stars

One element I added to the 95% done nursery was a feature wall of coordinating colored tin barn stars.  As my design board showed, I wanted one in about every color to match our Baby Boats bedding from Pottery Barn Kids my cousin purchased for us.


So, I collected the stars at the early "end of summer" clearance sales at Joann's fabrics, and a few at Michael's. They were $4 and under, each, and around 70% off when I picked them up.  The three little ones were under a $1 each.


Because they were dark colors (mostly for fourth of July/Americana decor) we needed to spray primer them, before I used acrylic paints to paint them up in coordinating colors.  I love the large star.  It has some really great detail on it.


I got the quilt out, and my paint bucket and picked the colors that best coordinated... not matched exactly.  After all, I was adding them to the lime green walls (which I've been told in person is much more the color of a granny smith apple, instead of a lime)


Here they are painted with the first coat...


And, here's the corner of the nursery I added them to!  (Doesn't the glider look great in there too!  Here's how I slipcovered the cushions...)   I love the pop they provide, and they're the first thing you see entering the room.


Isn't paint great?!

Now, if I could just finish the other corner of the room before baby arrives...  Since it's 95% done though, we're in good shape, and I hope to share a post or two with you each day for the next few days as we count down to his arrival!

Monday, September 6, 2010

Initial Artwork: Letter C

I suppose initial artwork, or lettering in the nursery is nothing new.  It's nice to stamp a nursery, or a kids room with their name to make it more personal.  (Heck, I've even talked about my love of monograms before too!)  When we settled on a name for our baby boy, I was able to purchase a white letter "C" to try to attempt a project along these lines.

So, here's what I did.


First I took an $8 clearance frame from Home Goods (regularly $25!).  Of course, the butterfly motif wasn't going to quite cut it with the baby boats bedding.  :)  It was all wrong!


The white frame stayed, but the green mat was painted blue.  I painted this with acrylics, and I think it looked like wood when I was done.  I just loved that the mat was cut to fit the square frame already, plus the cut out/lined details were great.


Because of the depth of the frame, I was able to adhere the C to the board, and still have room to close the frame down.  First though, I needed to cover the cardboard backing with green houndstooth fabric, that matches the curtains.  I used spray adhesive and adhered a piece of fabric to the top of the cardboard.  Since the mat was going to cover the edges of the cardboard backing, I didn't fold it around the back edges... just simply adhered to the top.


Then, after a failed hot glue gun attempt at putting the C on the fabric, I checked out my E6000 glue for it's specs... turns out it adheres fabric to wood with a 3 smiley face rating (I guess that's good?!)  So I dabbed it on the backing of my MDF "C" and placed it in the middle of the fabric (I had lined up the mat as a guide.)


Then, just cleaned and reassembled!  Oh, I just L-O-V-E it, but am even more excited to see it on the wall in baby boy's room!


It's amazing what a little vision and paint will do!

What do you think about the transformation, and colors?

More to come on the nursery progress.  Labor Day Weekend brought a lot of progress that I can't wait to share!
Related Posts with Thumbnails