As I mentioned in my post yesterday, there are tons of tutorials stemming from the wedding to share with you. Here is the first, and one of my favorites:
Still sick, and running out of time, I was extremely disappointed with Shane Co. I must have gone on the wrong day- there weren't enough employees, the store was packed, and the gentleman helping me seemed preoccupied and distracted. I'm glad I didn't purchase anything there (oh, and we'll stick to our regular jeweler, William McConnell & Sons).
Freaking out a bit, I came upon some jewelry at Target that would have worked, but alas there weren't enough in stores for my group! A trip to the craft store, Joann's to be exact, to find the material to replicate the Target pieces would turn into a blessing. It was there I found the strands of real freshwater pearls, platinum coated toggle clasps and the cute little jars to present them in- totally different than the Target idea I had originally gone in for.
Here's how I made 5 pearl bracelets and cute display bottles for ~$28.
First, I found these 7" strands of freshwater pearls at 40% off... I loved the color, weight, and shape of them (not uniform), and threw them in the cart.
Next, I needed to find clasps- I was hoping for toggles... I found that Joann's carriers all sorts of different metal findings, and I chose the super shiny platinum coated version, in a small toggle perfect for the size of the pearls and the fact that I was making bracelets. These too were 40% off. SCORE!
I ran through the store looking for something clever that I could present the bracelets in that wasn't tacky, and would make them seem a bit more "special". I located some mini jars that were $1 each. Perfect!
Now, I hadn't really made much jewelry as of late, but it all came back to me pretty quickly. I doubled the white beading thread (always do this as it makes it stronger, and you have a fall back in case one sring breaks!) and knotted the ends to the small silver jump rings. I always coat my knots, whether in clear nailpolish, or with a beading rubber cemet...
Then, I threaded the pearls, and knotted the other end to the other jump ring and glued. I did this 4 more times, and let them dry in between.
I needed to make 5 total- 4 for the bridesmaids, and 1 for the flower girl. The "adult" versions were just over 7" long with the pearls, and probably another 3/4" for the toggle. For my flower girl (she's 5...), hers measured out 6", plus the 3/4" for the toggle... which actually was still a bit too big.
With two sets of needle-nose pliers, I attached both ends of the toggle, and called it a day! 5 bracelets I believe in around 2 hours? Plus, I got to get my beading tools out again- How fun.
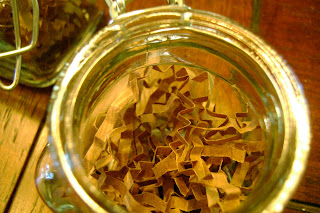
I put some crinkled packing paper in each small jar, and placed the bracelet inside. I think they turned out super cute! I had picked up some tissue paper and coordinating ribbon in our wedding colors, and wrapped these all up seperately to add to the Bridesmaid's and flower girl's gift bags. I couldn't be more pleased with them- I only wish I had made one for myself :)
So, for the cost of about half of ONE of the bracelets I might have purchased at Shane Co I made 5 bracelets and holders that I REALLY enjoyed. I hope they did too.
The breakdown & Supplies:
5, 7" strands of pearls: $2.39/ea
5 platinum coated toggles: $2.39/ea
5 glass jars, $0.60/ea (I had 40% off coupons for that week!)
crinkle paper: on hand, free
beading thread, beading needle, small jump rings, needle-nose pliers, rubber cement: on hand, free
TOTAL: ~$28 for 5 bracelets
I guess the saying is true- if you want something done right, you have to do it yourself!

