That sometimes happens to me (ok, a lot of the time happens to me) but yesterday was even above my normal craziness! Perhaps it's the looming party deadline (see this post for everything I have to do TOMORROW) but I fell into the spirit yesterday and tackled many decor and prep tasks for Saturday.
I made these too, what a nice surprise!
I was digging through one of my craft boxes for some fishing line I know I have to hang some glittery snowflakes, and came across a stash of craft perals in all different sizes, that I've probably had for 10+ years. Then, I recalled a failed project I never posted, but related to one I will post soon, that involved styrofoam balls. The light bulb went off. No, really, it did! I could adapt this project Lindsay posted on Centsational Girl showed us to make some classy ornaments for my tree!
So, here you have it folks: how to make Pearl Passion Ornaments! Enjoy!
Materials Needed:
2" styrofoam balls (mine came in a 12 pack)
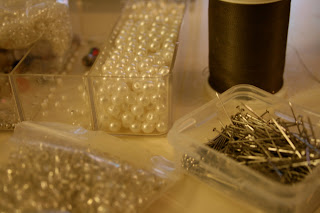
dressmaker pins (small box has like 350 or something in it. I used nearly the whole box for 2 ornaments of this size)
Pearls (I used about 300 on 2 ornaments)
Silver beads (smaller than the opening of the pin head, and the pearl opening so they don't slip off)
ribbon, rope, or other string to attach as a loop
Hot Glue Gun (optional)
This is so simple, it's not really tutorial worthy, but here we go:
Take a pin, and attach one silver bead, then a pearl. Push the pin into the foam. Yep. That's basically it!
After I put the first full circle of pin+bead+pearl pins in, I cut my gold cord ribbon to the length, and attached with a pin. I hotglued it down into the styrofoam, then glued on top again. Depending on the ribbon you use, you may be ok with pins only.
I read somewhere to do a full circle around one direction, then switch 90 degrees and do another circle. Then, you should have 4 distinct sections to fill in. This seemed to work well for me.
Can't you just envision the variations you could do? I think these would make pretty vase filler, or table accents. I want to do a LARGE one and use in the off season.
If you make it, I want to see! :)


