Pages

WELCOME!

Happy 2012!

Welcome, won't you stay a while? There's so much to do, and we hope to share it all with you this year. Design, crafts, frugal living... You'll find this and more at Design-Aholic!

Thursday, August 5, 2010

A little Hemnes for the Nursery

Our nursery isn't going to have much clutter, or much furniture for that matter!  Just the basics, for now- remember when I posted our nursery design board here?

Our Pottery Barn Crib,
Our Dutalier glider & ottoman,
and hopefully soon,

the 8-drawer Hemnes dresser from IKEA:
Remember, here's a quick peek of the nursery design board:


BUT, I thought I would search for pictures of others that had used this piece that I feel is extremely versatile (not to mention, grows with the child) in their own real world settings.  I came across some great features, I now I'm convinced I'm not crazy.


As a side note, I'm thankful it's the end of the day Thursday, because I have the drive and energy to start working on other nursery projects this weekend.  Cross my fingers (yours too?) that this energy streak continues, because with about 9 weeks left, we've got a heck of a lot to do still!

Anyone else out there not use a "traditional" change table, and opt for a dresser instead?  Any pros/cons you'd like to mention?

TIA!  more coming soon... stay tuned!

Saturday, July 31, 2010

Manzanita Branch Centerpiece Decor

To continue tutorial time, (I recently posted about the pearl bridesmaids bracelets as well!) today I wanted to share with you the process for completing the manzanita branch centerpieces we used for our wedding reception.  :)


I had the idea for the branches long ago, but exactly how to construct and complete them didn't really hit until about a month ago.  A few friends went to a wedding and posted pictures of what would be the final inspiration for our centerpieces:


As you may (or may not?) recall, I purchased 12 branches inexpensively from a Californian seller on eBay.  All 12 branches shipped were like $75 or something silly.

The rest was really easy-

We used 5" cedar fence boards cut to size for the bases- these we hand picked for straightness (7 of them) at Lowes, which is also where we picked up the paint too.  Originally we were going to glue them together, but ended up using a nail gun and finish nails and they were done in a snap (Z did the leg work on these, Love you!)

Yep, check out that price: $1.89/ea.  Love it!


After the boxes were built (we ended up with 14, and wood left over) they were coated twice with black semi gloss paint... another great find!  I was about to have the paint counter mix up black for me, when they took too long and I started poking around the paint section... Low and behold, there was a quart of BLACK Valspar semi gloss for $2.50 on the "oops" paint rack.  SCORE!  My friend Gina painted one coat, then later that day, Z painted another coat on the boxes, giving them a nice sheen.


I purchased 12 packs of floral foam at the dollar store, and spanish moss at Joann's (I used way less than I thought I would- I purchased 4 bags, and have 2 whole bags left- could have just purchased the same stuff at the dollar store!)


The branches were secured in the boxes with the floral foam- each one took about a whole package of the foam, and luckily it was already cut into 4 blocks (each "pack" was $1 and had 4 small bricks in it).  Some of the branches required a bit more support, and a stuck a river rock or two in with the floral foam.  Those also came from the dollar store, and I have extras!


After the branches were secured, the next day we added the spanish moss around the top of the boxes to cover the base of the branch and the foam.  Then, we used the pom poms and simply hot glued 1 at the base of every centerpiece, and a few throughout the "branches".

 There's my sister contemplating the next pom pom location.  Please excuse the messy garage background.  :)

The colors turned out perfect- and they looked exactly how I had hoped.  :)


All in, these 12 centerpieces, which we gave away to guests cost just about $110, or $9.50/ea.

Here's the breakdown:
12 manzanita branches: $75 shipped from eBay listing
7 cedar fence boards: $14
1 quart black semi gloss paint: $2.50
2 packs of tissue paper (for pom poms): $3
2 bags of spanish moss: $3
12 packs of floral foam bricks: $12
TOTAL: ~$110 (or about $9.50/ea)

When I have some good photos from the photographers, I'll post those, but for now, heres an action shots from the reception where you can see them on the tables (sort of):


Oh, and I found out that people loved "winning" the centerpieces!  One of my family friends getting married in January is even going to make them for her wedding!  I hope we get to go and see them :)

So, what do you think?  Pretty thrifty, eh?  It's the name of the game I tell ya- champagne taste on a beer budget.

Thursday, July 29, 2010

Tutorial: How I Made Pearl Bracelets

As I mentioned in my post yesterday, there are tons of tutorials stemming from the wedding to share with you.  Here is the first, and one of my favorites:

One of the things I wanted to give my bridesmaids (and flower girl) was a jewelry token for the event.  My mom had suggested pearl bracelets, but honestly, I couldn't find ones I was happy with even at a ridiculous price each.  Here's what I did end up with, and the story...


Still sick, and running out of time, I was extremely disappointed with Shane Co.  I must have gone on the wrong day- there weren't enough employees, the store was packed, and the gentleman helping me seemed preoccupied and distracted.  I'm glad I didn't purchase anything there (oh, and we'll stick to our regular jeweler, William McConnell & Sons).

Freaking out a bit, I came upon some jewelry at Target that would have worked, but alas there weren't enough in stores for my group!  A trip to the craft store, Joann's to be exact, to find the material to replicate the Target pieces would turn into a blessing.  It was there I found the strands of real freshwater pearls, platinum coated toggle clasps and the cute little jars to present them in- totally different than the Target idea I had originally gone in for.


Here's how I made 5 pearl bracelets and cute display bottles for ~$28.

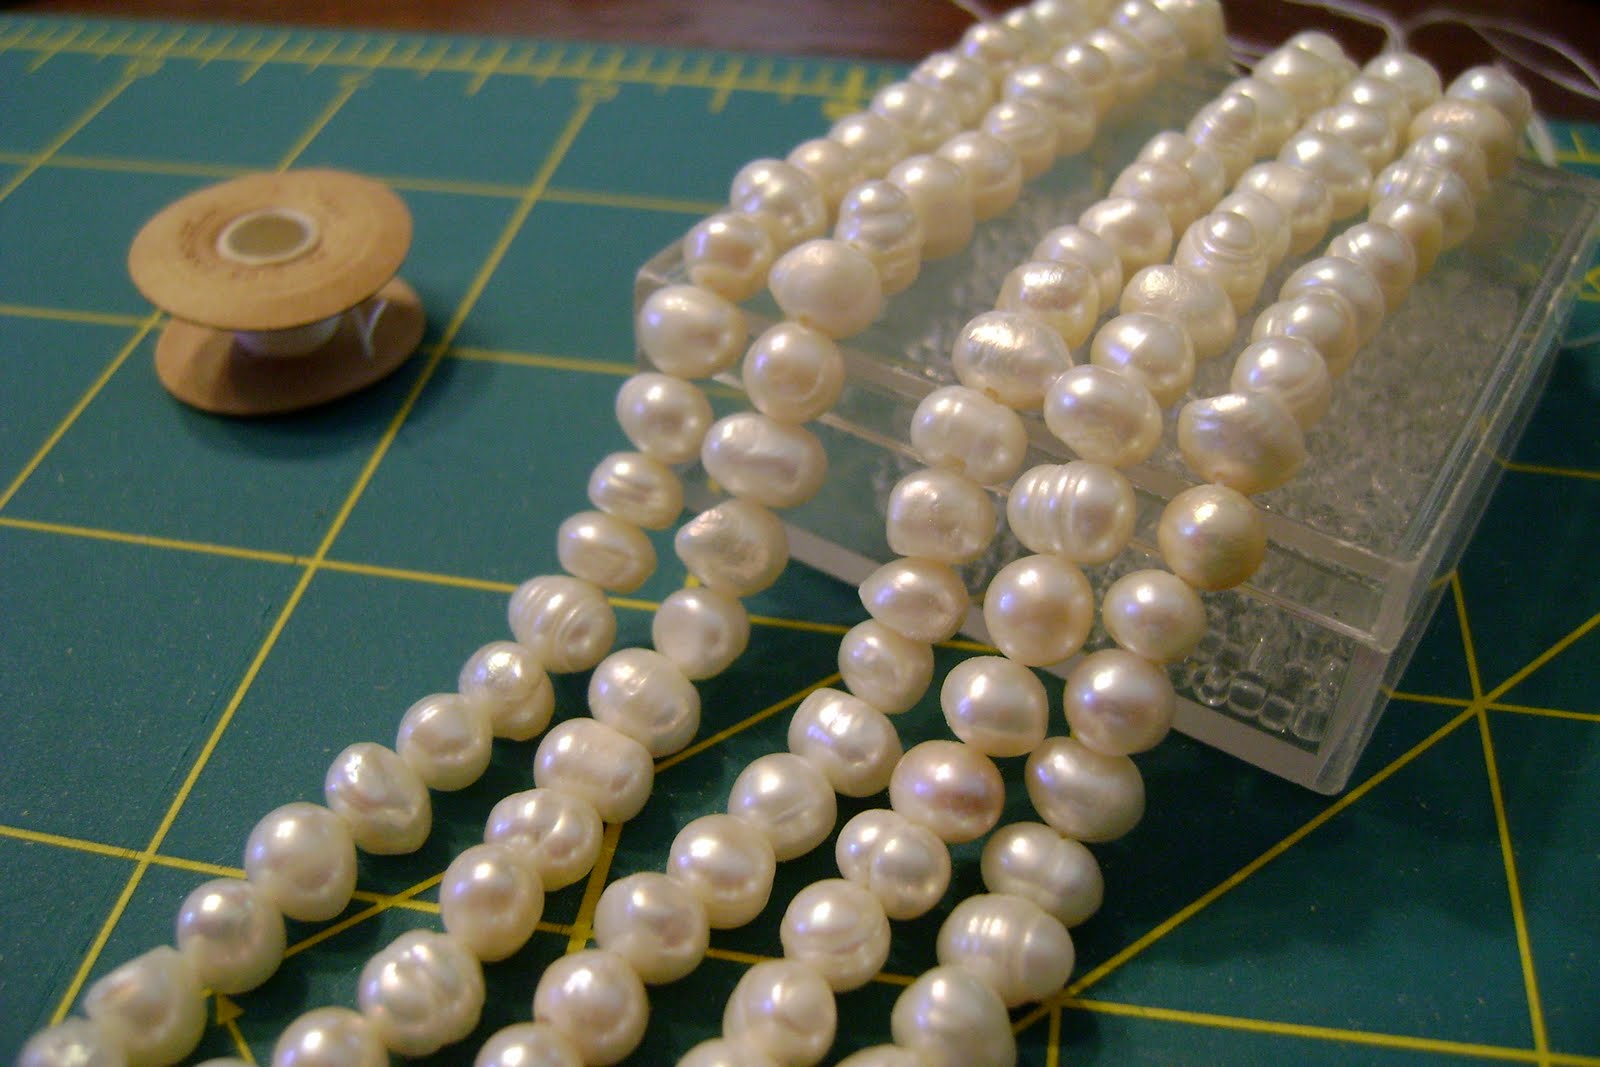
First, I found these 7" strands of freshwater pearls at 40% off...  I loved the color, weight, and shape of them (not uniform), and threw them in the cart. 


Next, I needed to find clasps- I was hoping for toggles... I found that Joann's carriers all sorts of different metal findings, and I chose the super shiny platinum coated version, in a small toggle perfect for the size of the pearls and the fact that I was making bracelets.  These too were 40% off.  SCORE!


I ran through the store looking for something clever that I could present the bracelets in that wasn't tacky, and would make them seem a bit more "special".  I located some mini jars that were $1 each.  Perfect!


Now, I hadn't really made much jewelry as of late, but it all came back to me pretty quickly.  I doubled the white beading thread (always do this as it makes it stronger, and you have a fall back in case one sring breaks!) and knotted the ends to the small silver jump rings.  I always coat my knots, whether in clear nailpolish, or with a beading rubber cemet...


Then, I threaded the pearls, and knotted the other end to the other jump ring and glued.  I did this 4 more times, and let them dry in between.


I needed to make 5 total- 4 for the bridesmaids, and 1 for the flower girl.  The "adult" versions were just over 7" long with the pearls, and probably another 3/4" for the toggle.  For my flower girl (she's 5...), hers measured out 6", plus the 3/4" for the toggle... which actually was still a bit too big.

With two sets of needle-nose pliers, I attached both ends of the toggle, and called it a day!  5 bracelets I believe in around 2 hours?  Plus, I got to get my beading tools out again- How fun.


I put some crinkled packing paper in each small jar, and placed the bracelet inside.  I think they turned out super cute!  I had picked up some tissue paper and coordinating ribbon in our wedding colors, and wrapped these all up seperately to add to the Bridesmaid's and flower girl's gift bags.  I couldn't be more pleased with them- I only wish I had made one for myself :)


So, for the cost of about half of ONE of the bracelets I might have purchased at Shane Co  I made 5 bracelets and holders that I REALLY enjoyed.  I hope they did too. 

The breakdown & Supplies:
5, 7" strands of pearls: $2.39/ea
5 platinum coated toggles: $2.39/ea
5 glass jars, $0.60/ea (I had 40% off coupons for that week!)
crinkle paper: on hand, free
beading thread, beading needle, small jump rings, needle-nose pliers, rubber cement: on hand, free
TOTAL: ~$28 for 5 bracelets

I guess the saying is true- if you want something done right, you have to do it yourself!

Wednesday, July 28, 2010

Whew!

What.a.weekend!

To recap, yes, we got all of our craft projects done with plenty of time to spare before the wedding.  If you recall, there was quite a bit to do still with a week left till the big day!

The wedding ceremony went fabulous- of course, I cried walking down the aisle with my mom and seeing Z standing in his tux at the end.  Gosh, what a handsome guy.  :)


We did have the help of an awesome, just graduated from college event coordinator- we really couldn't have done it without her.  Luckily, she took the reigns (just what I needed) and scheduled everything.

The reception was nice too- a few minor glitches that probably to everyone else were nothing... Yes, I've got some phone calls to make still, but for now I'm sitting here with some new sickness, so those will have to wait... ugh. 

I will be cataloging the "how to's" shortly.

Here's what you can look forward to:

Tile coasters tutorial
Manzanita branch centerpieces
Tissue paper pom poms
Wedding program fans
Bridesmaids & flower girl/ring bearer packages
Pearl Bracelets
Card Box

While we don't have our photographer's photos back yet, here are a few sneak peaks at the finished products that I'll be featuring over the next little bit:


So stay tuned for some new tutorial posts, plus more nursery progress coming soon!

Related Posts with Thumbnails