I'm posting about how to make this:
From This: Chances are you have one of these laying around...
Those are nondescript blankets, in case you didn't get that.
If you haven't seen them before, they actually sell kits of these, for $20 at Joann's or other craft stores. They simply consist of rectangles of cutely patterned fleece.
The finished product is a double ply blanket... The premise is easy- cut the corners off of your two squares, fringe the ends with a rotary cutter, then tie the front side and back side fringe together. The two pieces of fleece (or whatever material you use) are then just attached together by the knotted fringes.
Since I started out with a FREE king size blanket that I didn't necessarily need (when I purchased the fabric for THESE curtains, I cut it in two pieces so that I could make TWO blankets.
The rotary cutter made it super easy. I folded the blanket into quarters, and essentially cut down on the folded edges, instead of spreading it out and cutting the single layer. The size of the original blanket was just so unruly that it worked better to just cut the fold off. Make sense?
With your two new squares, match all edges up, and cut 7"x7" squares out of the corners.
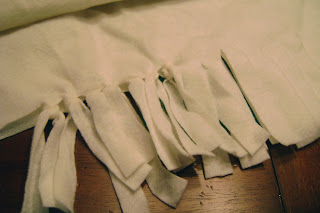
Next, use your rotary cutter, and cut through the two layers, up to 7" (in line with the 7" squares that you cut out in the last step. I made mine about 1-1.5" wide. No science in the measuring- I just eyeballed it.
Then, tie each front and back fringe piece together.
I did each side seperate. Cut Fringe. Tie Fringe. Cut Fringe. Tie Fringe. Until all 4 sides are done.
Then, try to photograph it for your blog, and fail miserably.
Can't it be summer yet, so that I have more light hours to work with? Humph.
Anyway, I hope you like it, and who knows, this COULD BE the giveaway in honor of reaching our 200th Follower! Who says there's just one giveaway?! Aren't you going to be surprised! :)
Thanks again everyone!


